This step-by-step guide covers the installation of the Decent small countersunk rinser.
1. Preparation
To install the countersunk pitcher rinser, you'll need the following:
A cutout in your countertop (305mm x 155mm)
A small countersunk Decent Pitcher Rinser
A 110v or 220v Flowjet (if you're connecting to unpressurized water; purchased separately)
The accessories pack (purchased separately)
Let's go through this step-by-step.
Small countersunk pitcher rinser
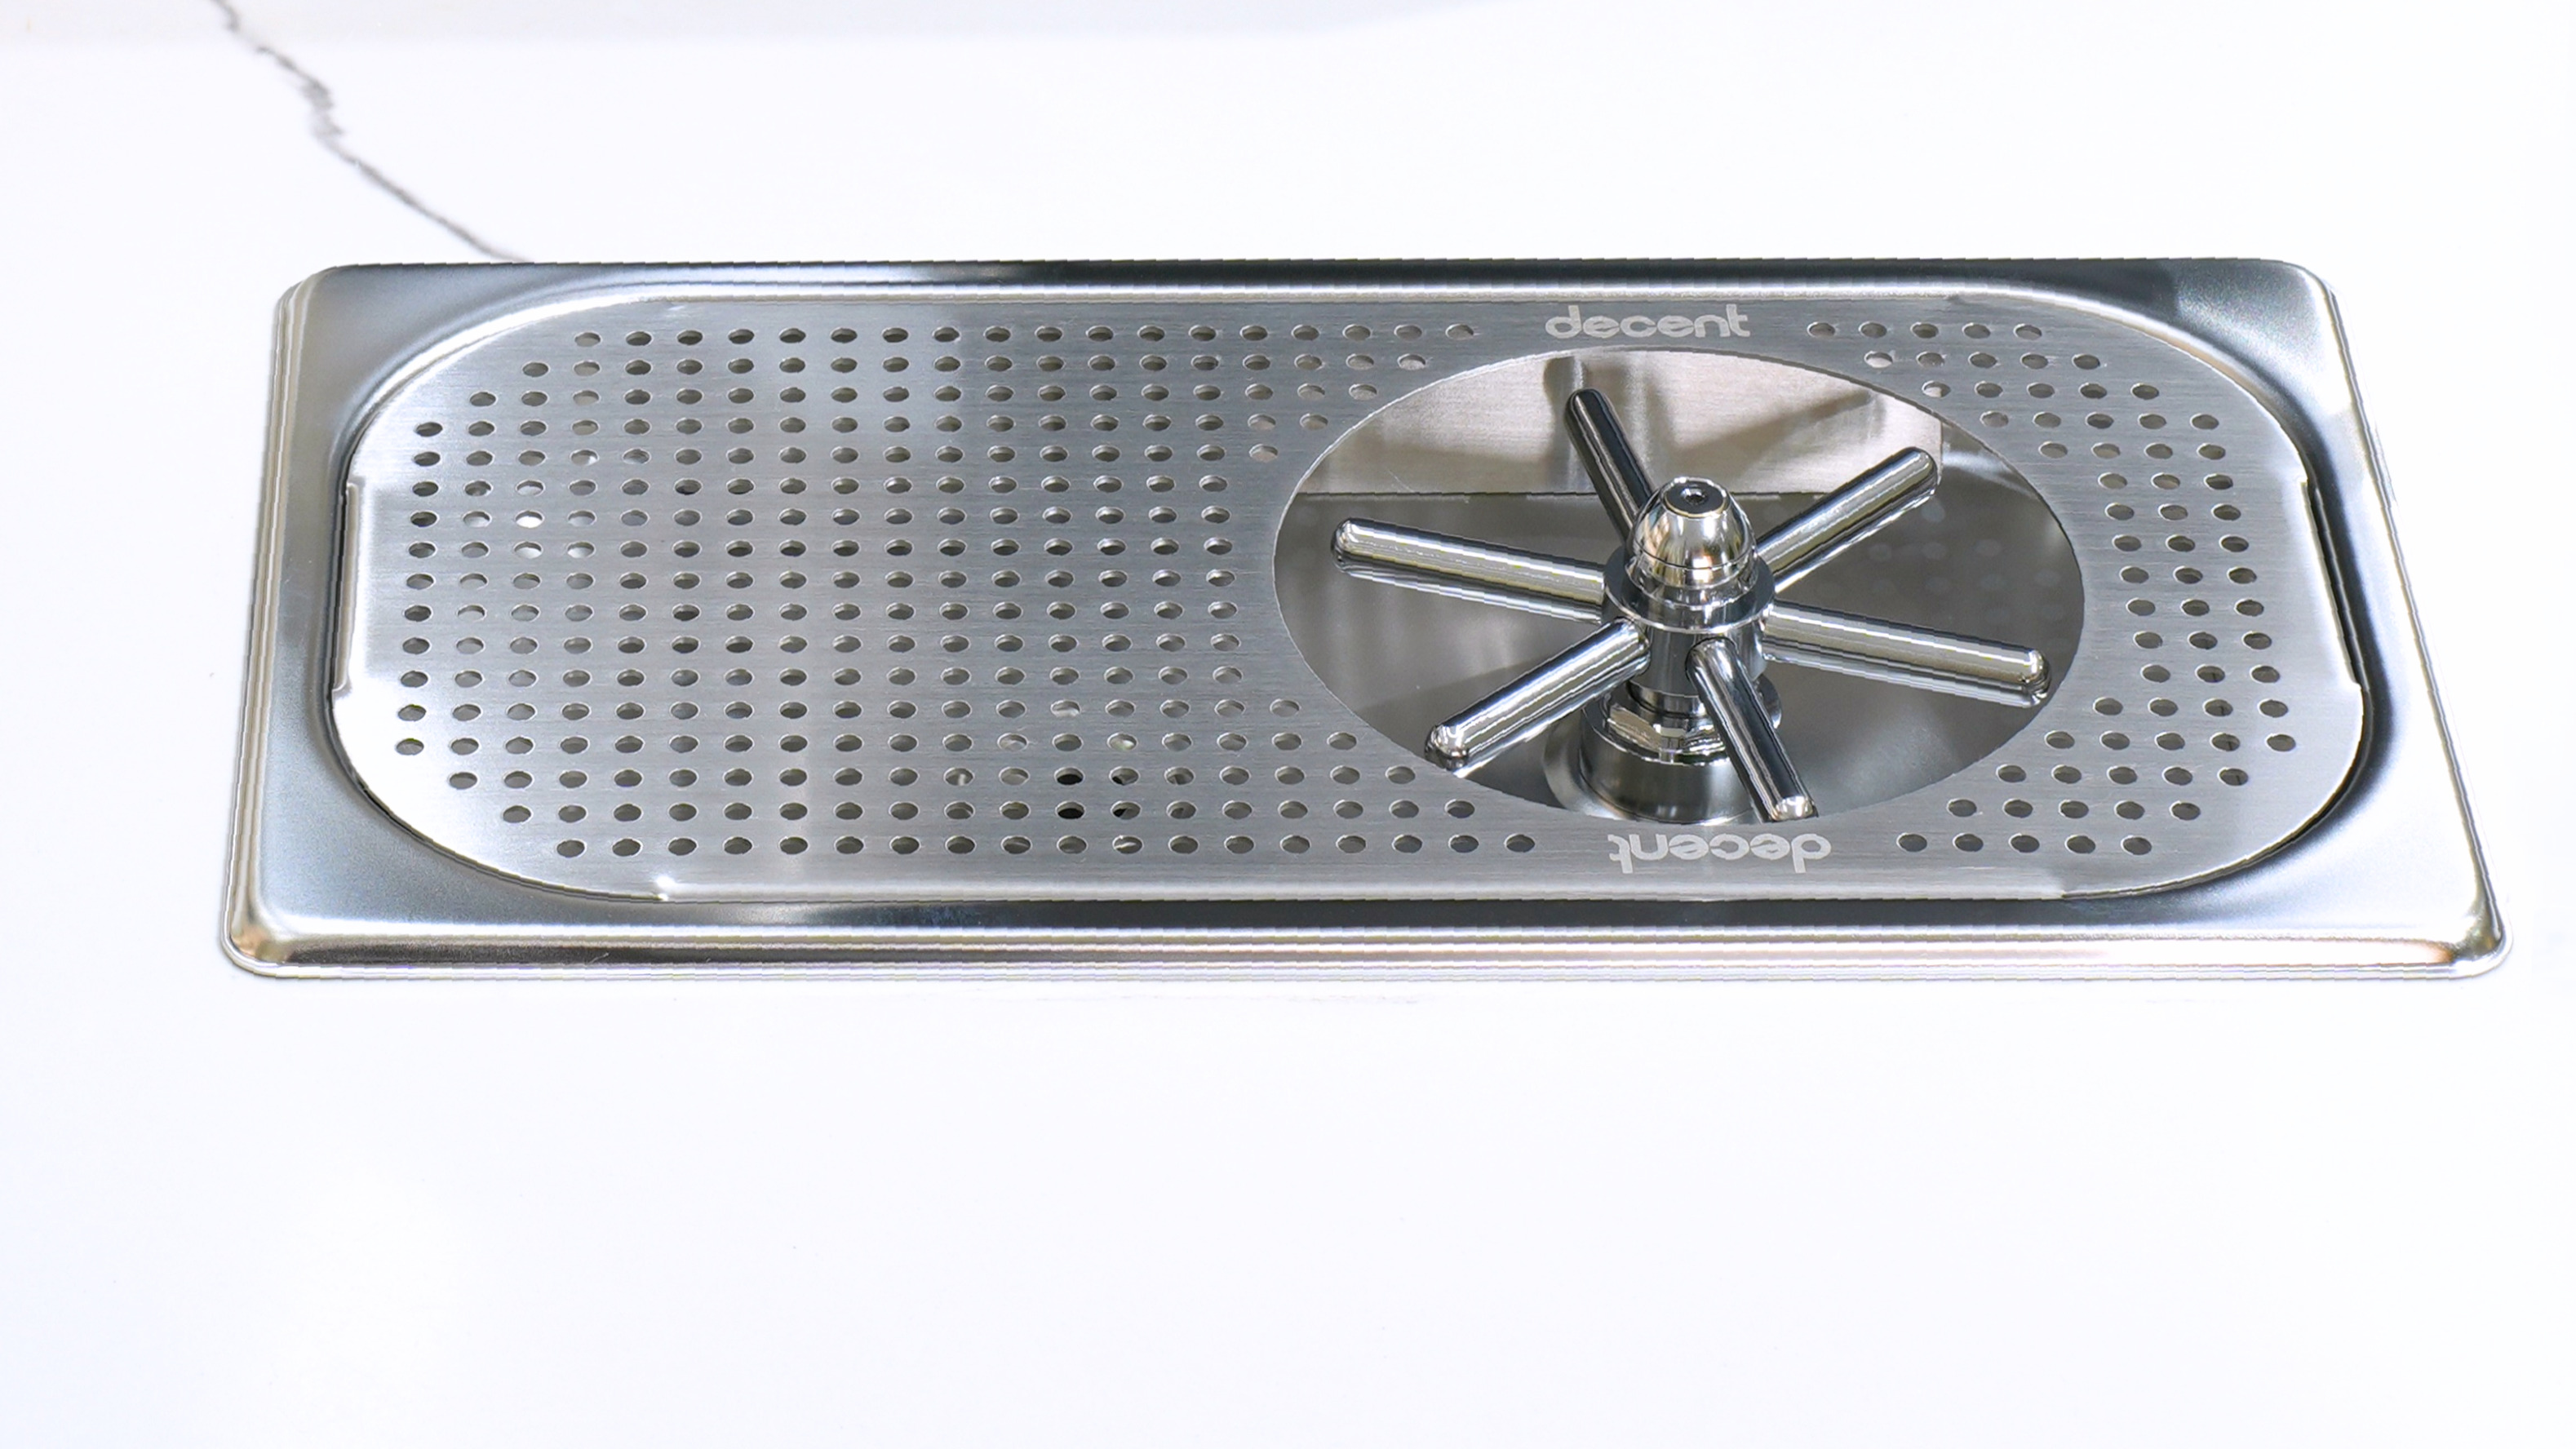
Image 1
Top view of the rinser on worktop
Countersunk rinser cut-out
You'll need a cutout of 305mm x 155mm on your countertop for this installation.
(Please note: These dimensions are for the small countersunk rinser only. If you have the portable countertop rinser, the cutout size will be different.)
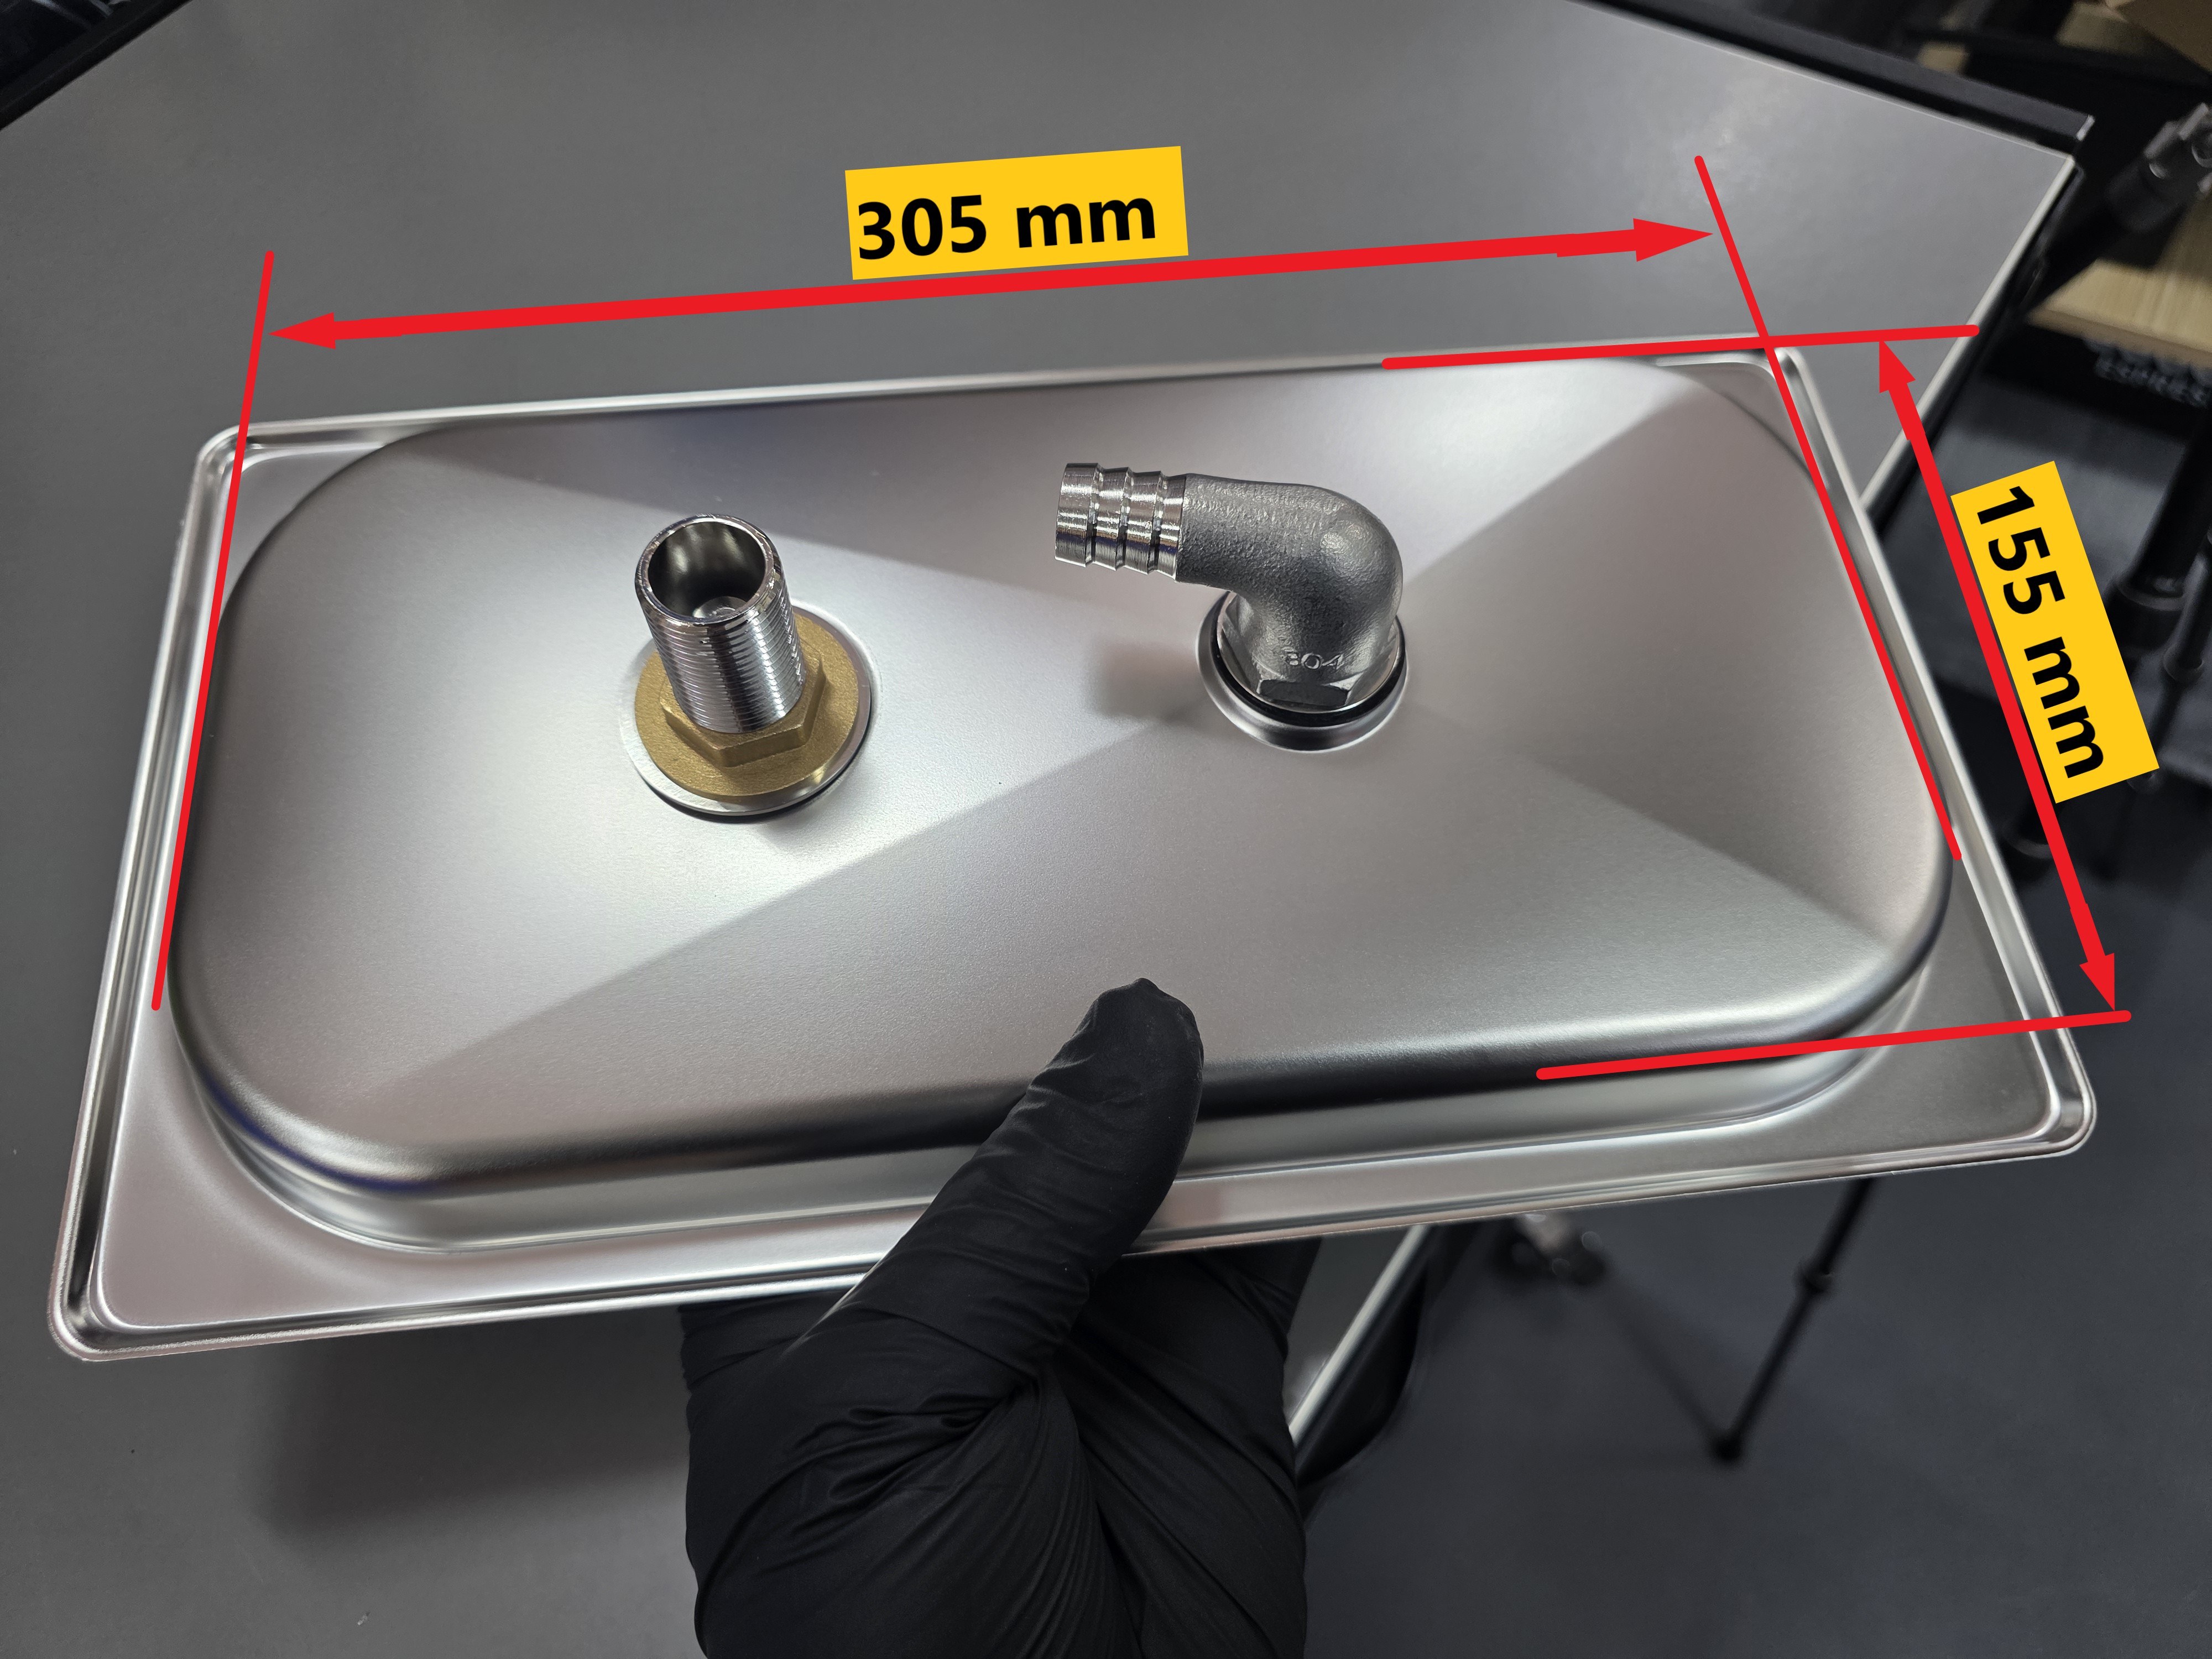
Image 4
Underside dimension of the rinser
110v or 220v flowjet
You'll only need this if you're connecting to an unpressurized water source, such as a large water bottle (Image 11). You won't need the Flowjet if you're connecting to a pressurized water source.
Accessories pack
The countersunk rinser will need this accessories pack.
2. Connecting to a water source
Refer to option 1 if you are connecting to a pressurized water source. Refer to option 2 if you are connecting to a still water source.
OPTION 1: Connecting the countertop rinser to a pressurized water source
If you have a pressurized water source, you can connect the water source to the countersunk rinser without a flowjet. You'll still need the accessories pack to connect the parts (Image 6).
(If you want to power the rinser with still bottled water, please refer to the Option 2 in the next section.)
Installation steps for pressurized water:
1. Attach the straight connector to your water source. Depending on your faucet outlet, you'll need to use either the male or female attachment connector (which we include in the accessories pack). Twist it in until it's tight and secure.
2. Attach the white elbow connector to the rinser by connecting it to the bottom of the rinser, right underneath the spray head. Twist it in until tight and secure, as shown in Image 7.
3. Join them together. The white elbow & the straight connector you just installed can now be joined together with the long thin white PE tube. Plug the ends of the PE tube into the two connectors, respectively. Make sure the tube is inserted all the way in and doesn't easily come loose.
4. Snap the blue locking clip into the gap between the grey ring and the connector to prevent any leaks. Refer to Image 7 & 8.
After the assembly, you'll have one extra connector as spare.
If your tap doesn't fit the two straight connectors that we provided, please let us know.
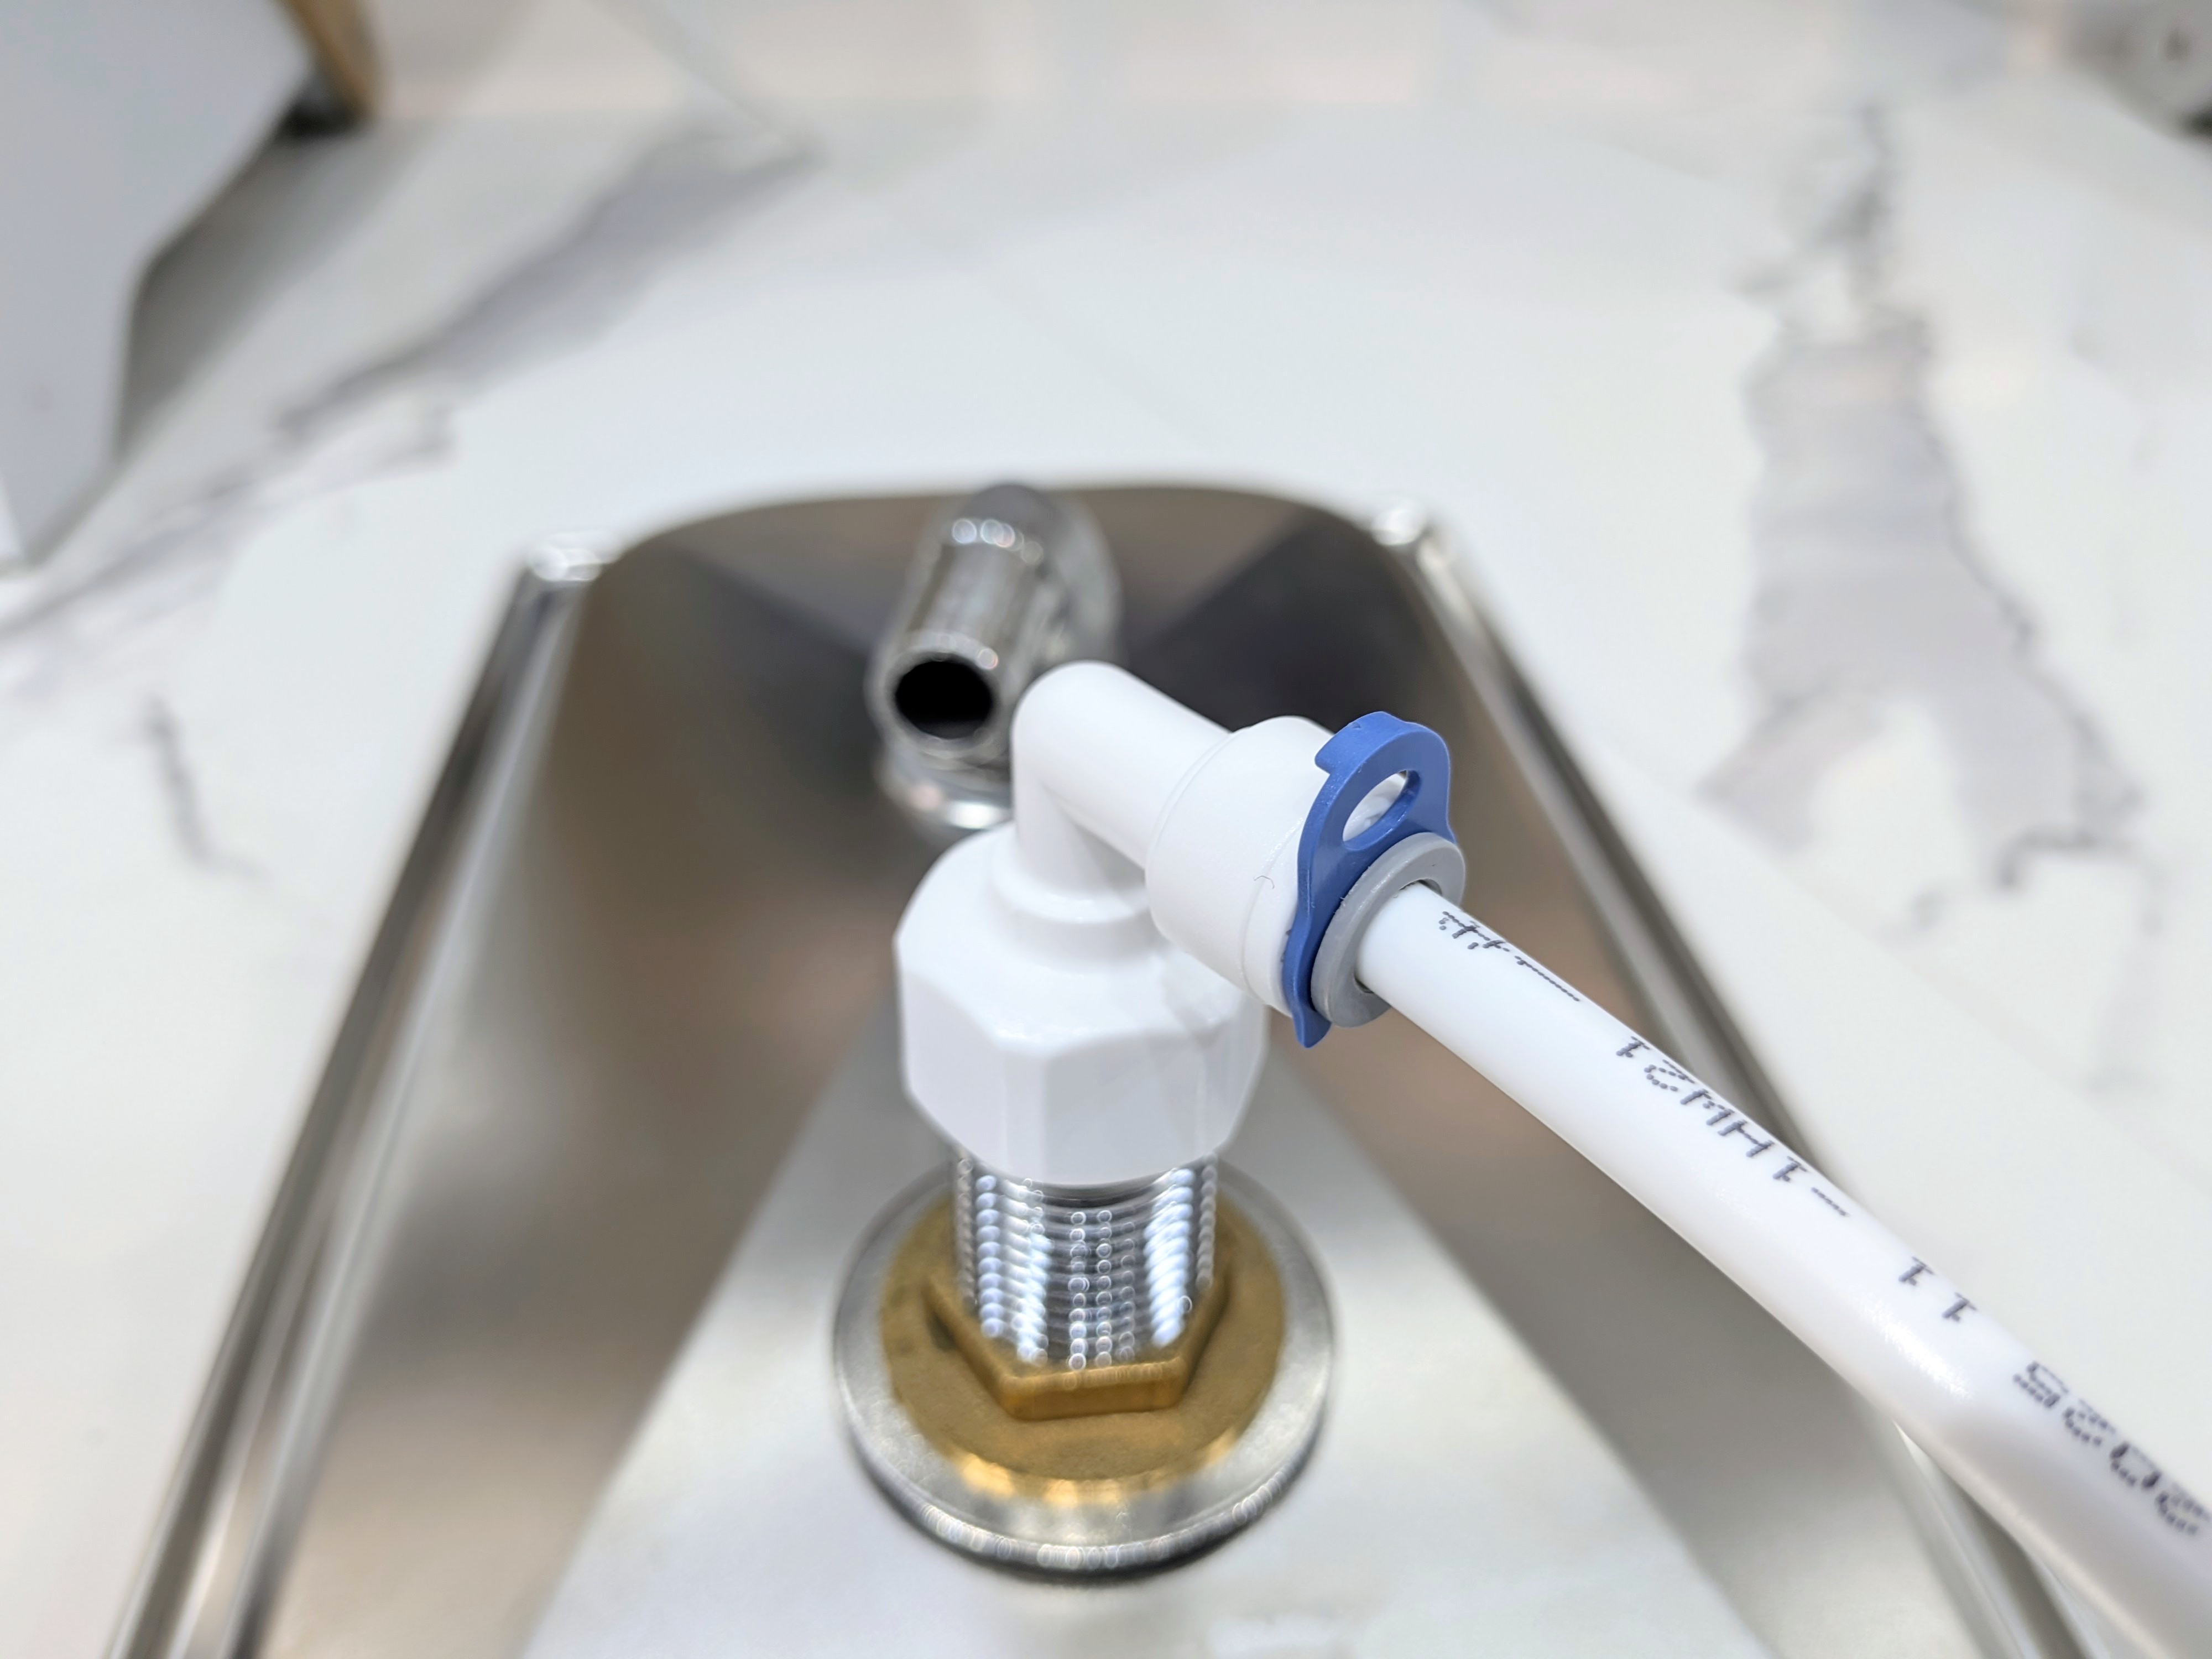
Image 7
The white elbow connector is attached to the bottom of the rinser.
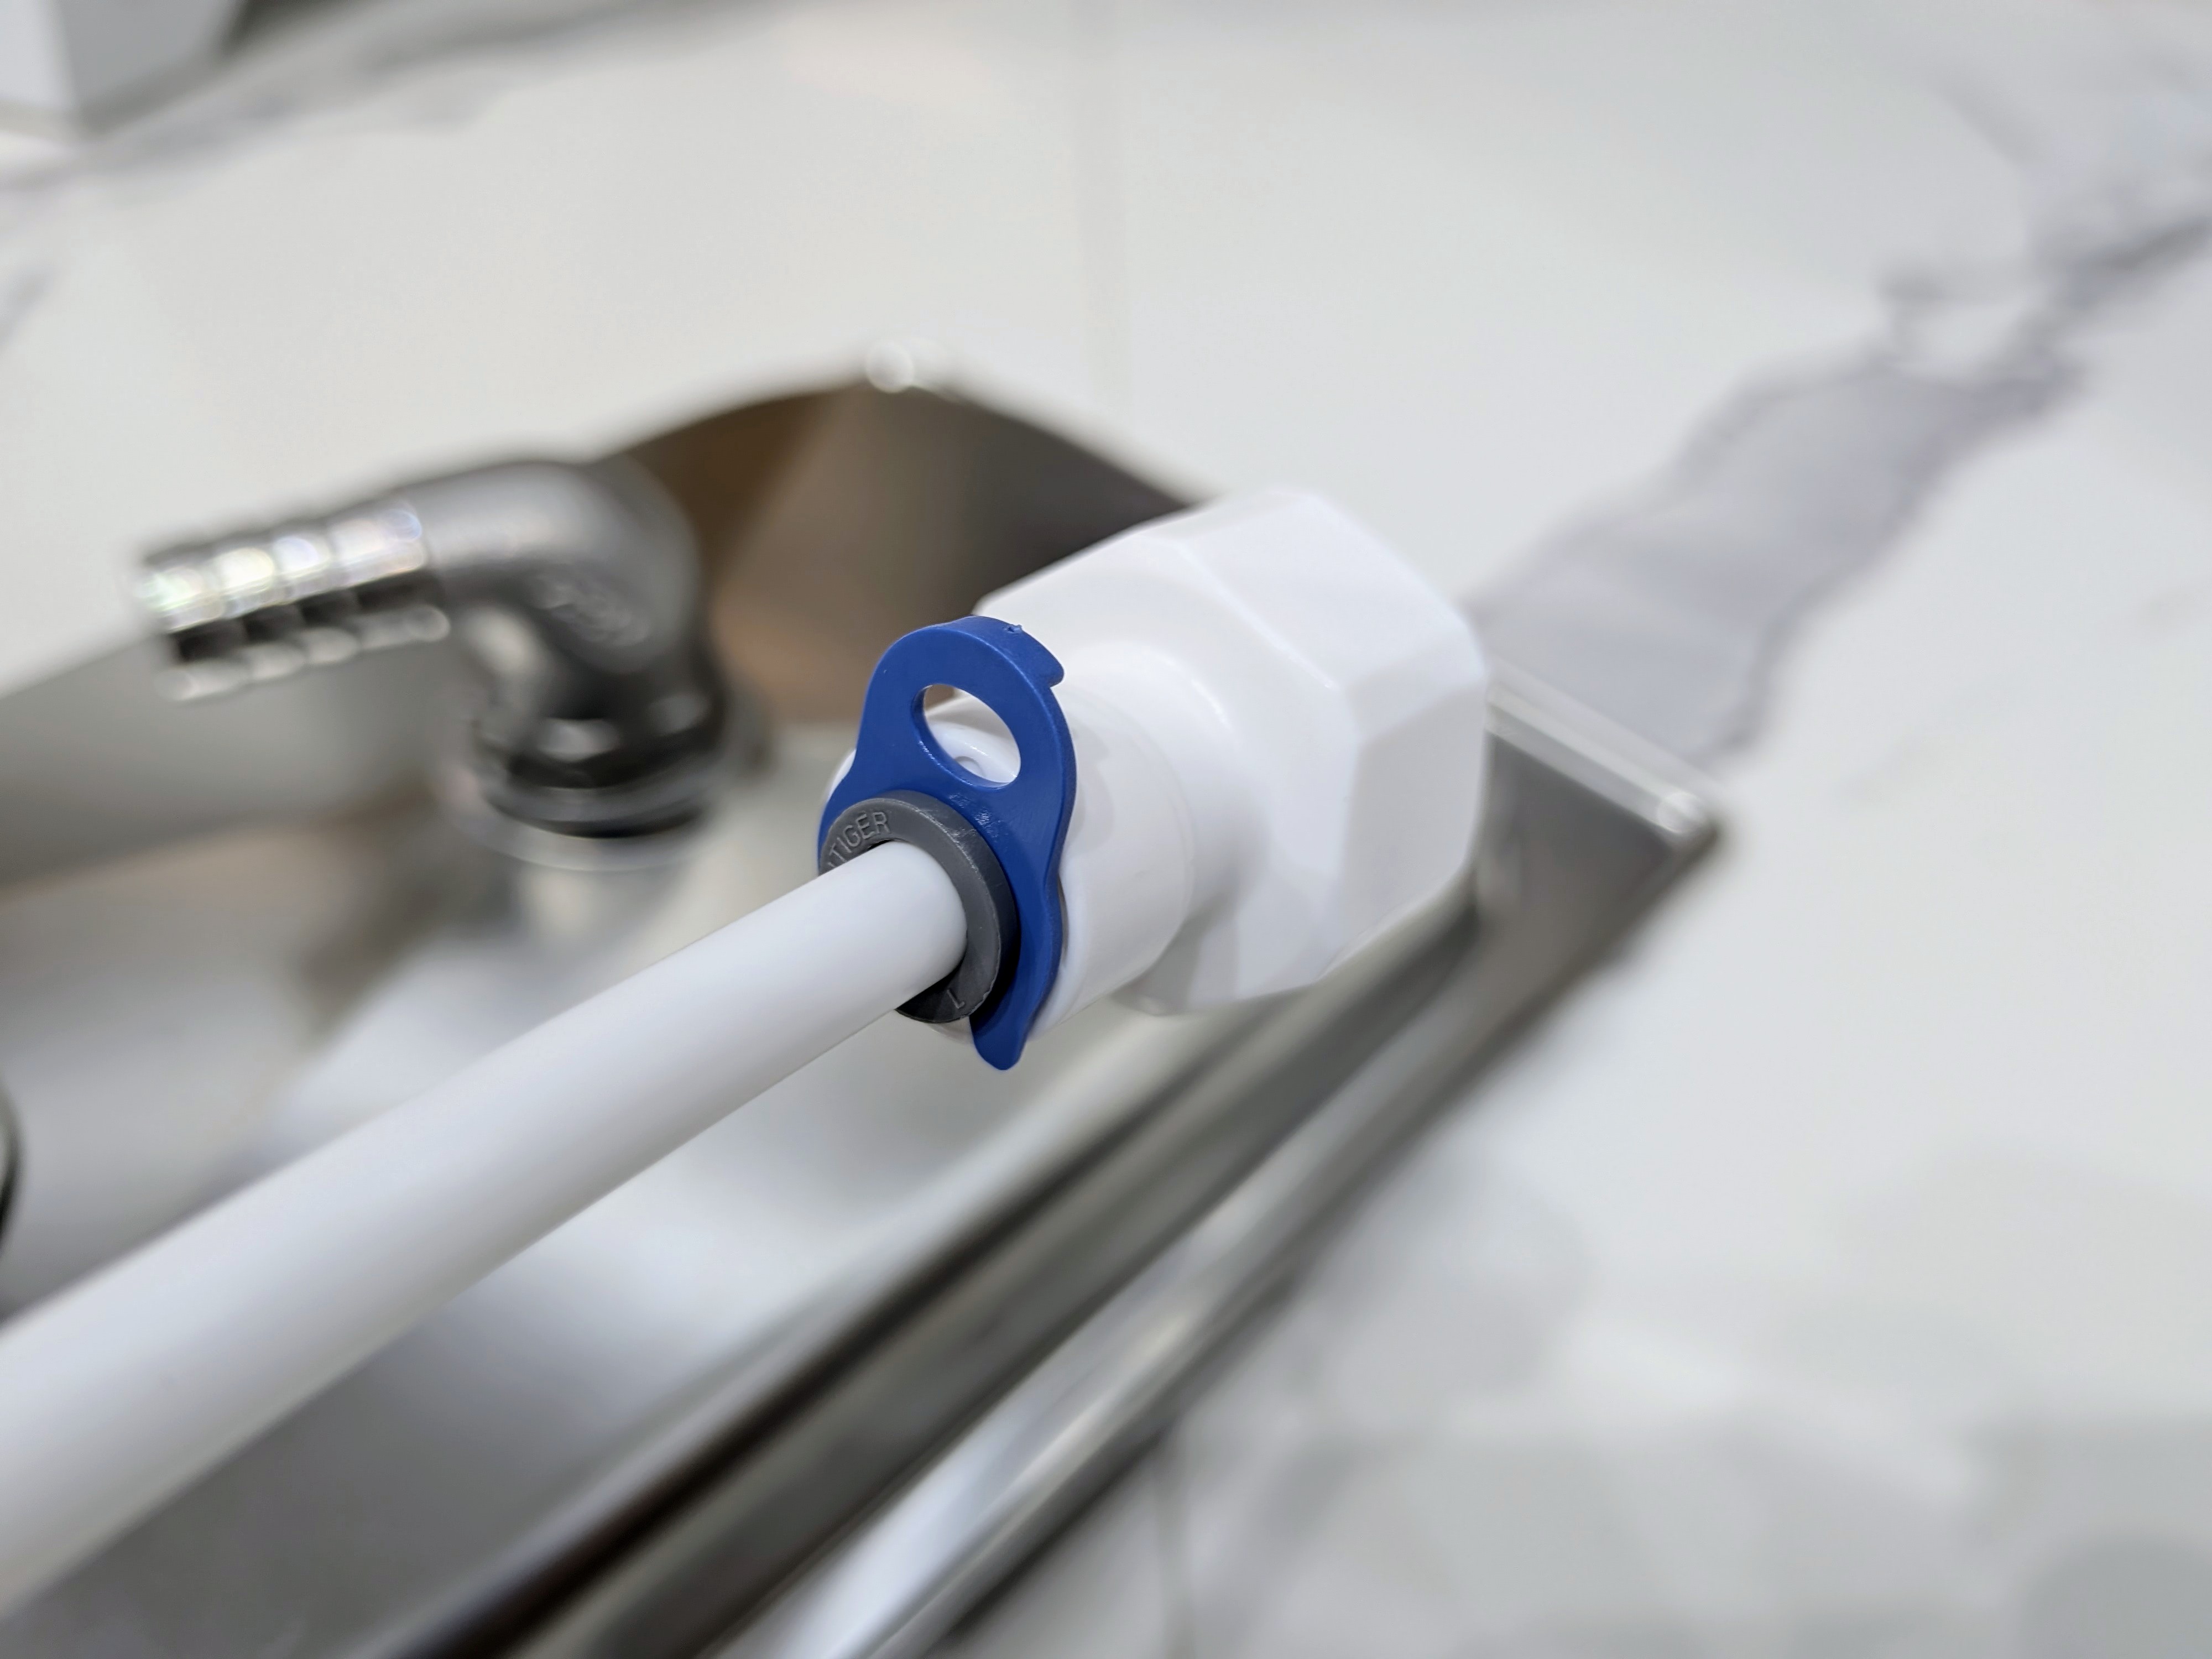
Image 8
The blue locking clip is inserted to secure the tube.
OPTION 2: Connecting the countertop rinser installation to a still water source
If you don't have a pressurized water source, you can pump water to the rinser from a bottle of still water by using the flowjet (Image 5). Be sure to select a flowjet with the appropriate voltage for your location (110v or 220v).
The flowjet has a 50cm water Inlet suction wand, which would work best for water bottles that are similar or lower in height. If your water bottle is taller, the flowjet can still function, but it might not fit quite as well. You'll also need the accessories pack to connect the parts.
Installation steps for unpressurized water:
1. Attach the white elbow connector to the rinser by connecting it to the bottom of the rinser, right underneath on the spray head. Twist it in until it's tight and secure, as shown in Image 7.
2. Remove the protective plug from the flowjet. On the side of the flowjet, there's a white protective plug with a blue clip. First remove the blue clip, then press down on the side of the white ring as shown in Image 9. You can then take out the white protective plug.
3. Insert the included tube into the connector. The flowjet comes with its own thin white PE tube. Insert the tube into the white embedded quick connector, where the white protective plug used to be. (Image 10)
4. Plug the other end of the tube into the white elbow connector on the rinser and secure the connection by inserting the blue locking clip into the gap between the grey ring and the connector (Image 7).
5. Insert the flow jet's inlet suction wand into the water bottle. The flowjet has a water Inlet suction wand, as shown in Image 11.
6. Plug in the flowjet's power supply and switch it ON with the rocker switch in the flowjet.
After the assembly, you will have one extra 3m PE tube and two white connectors as spares.
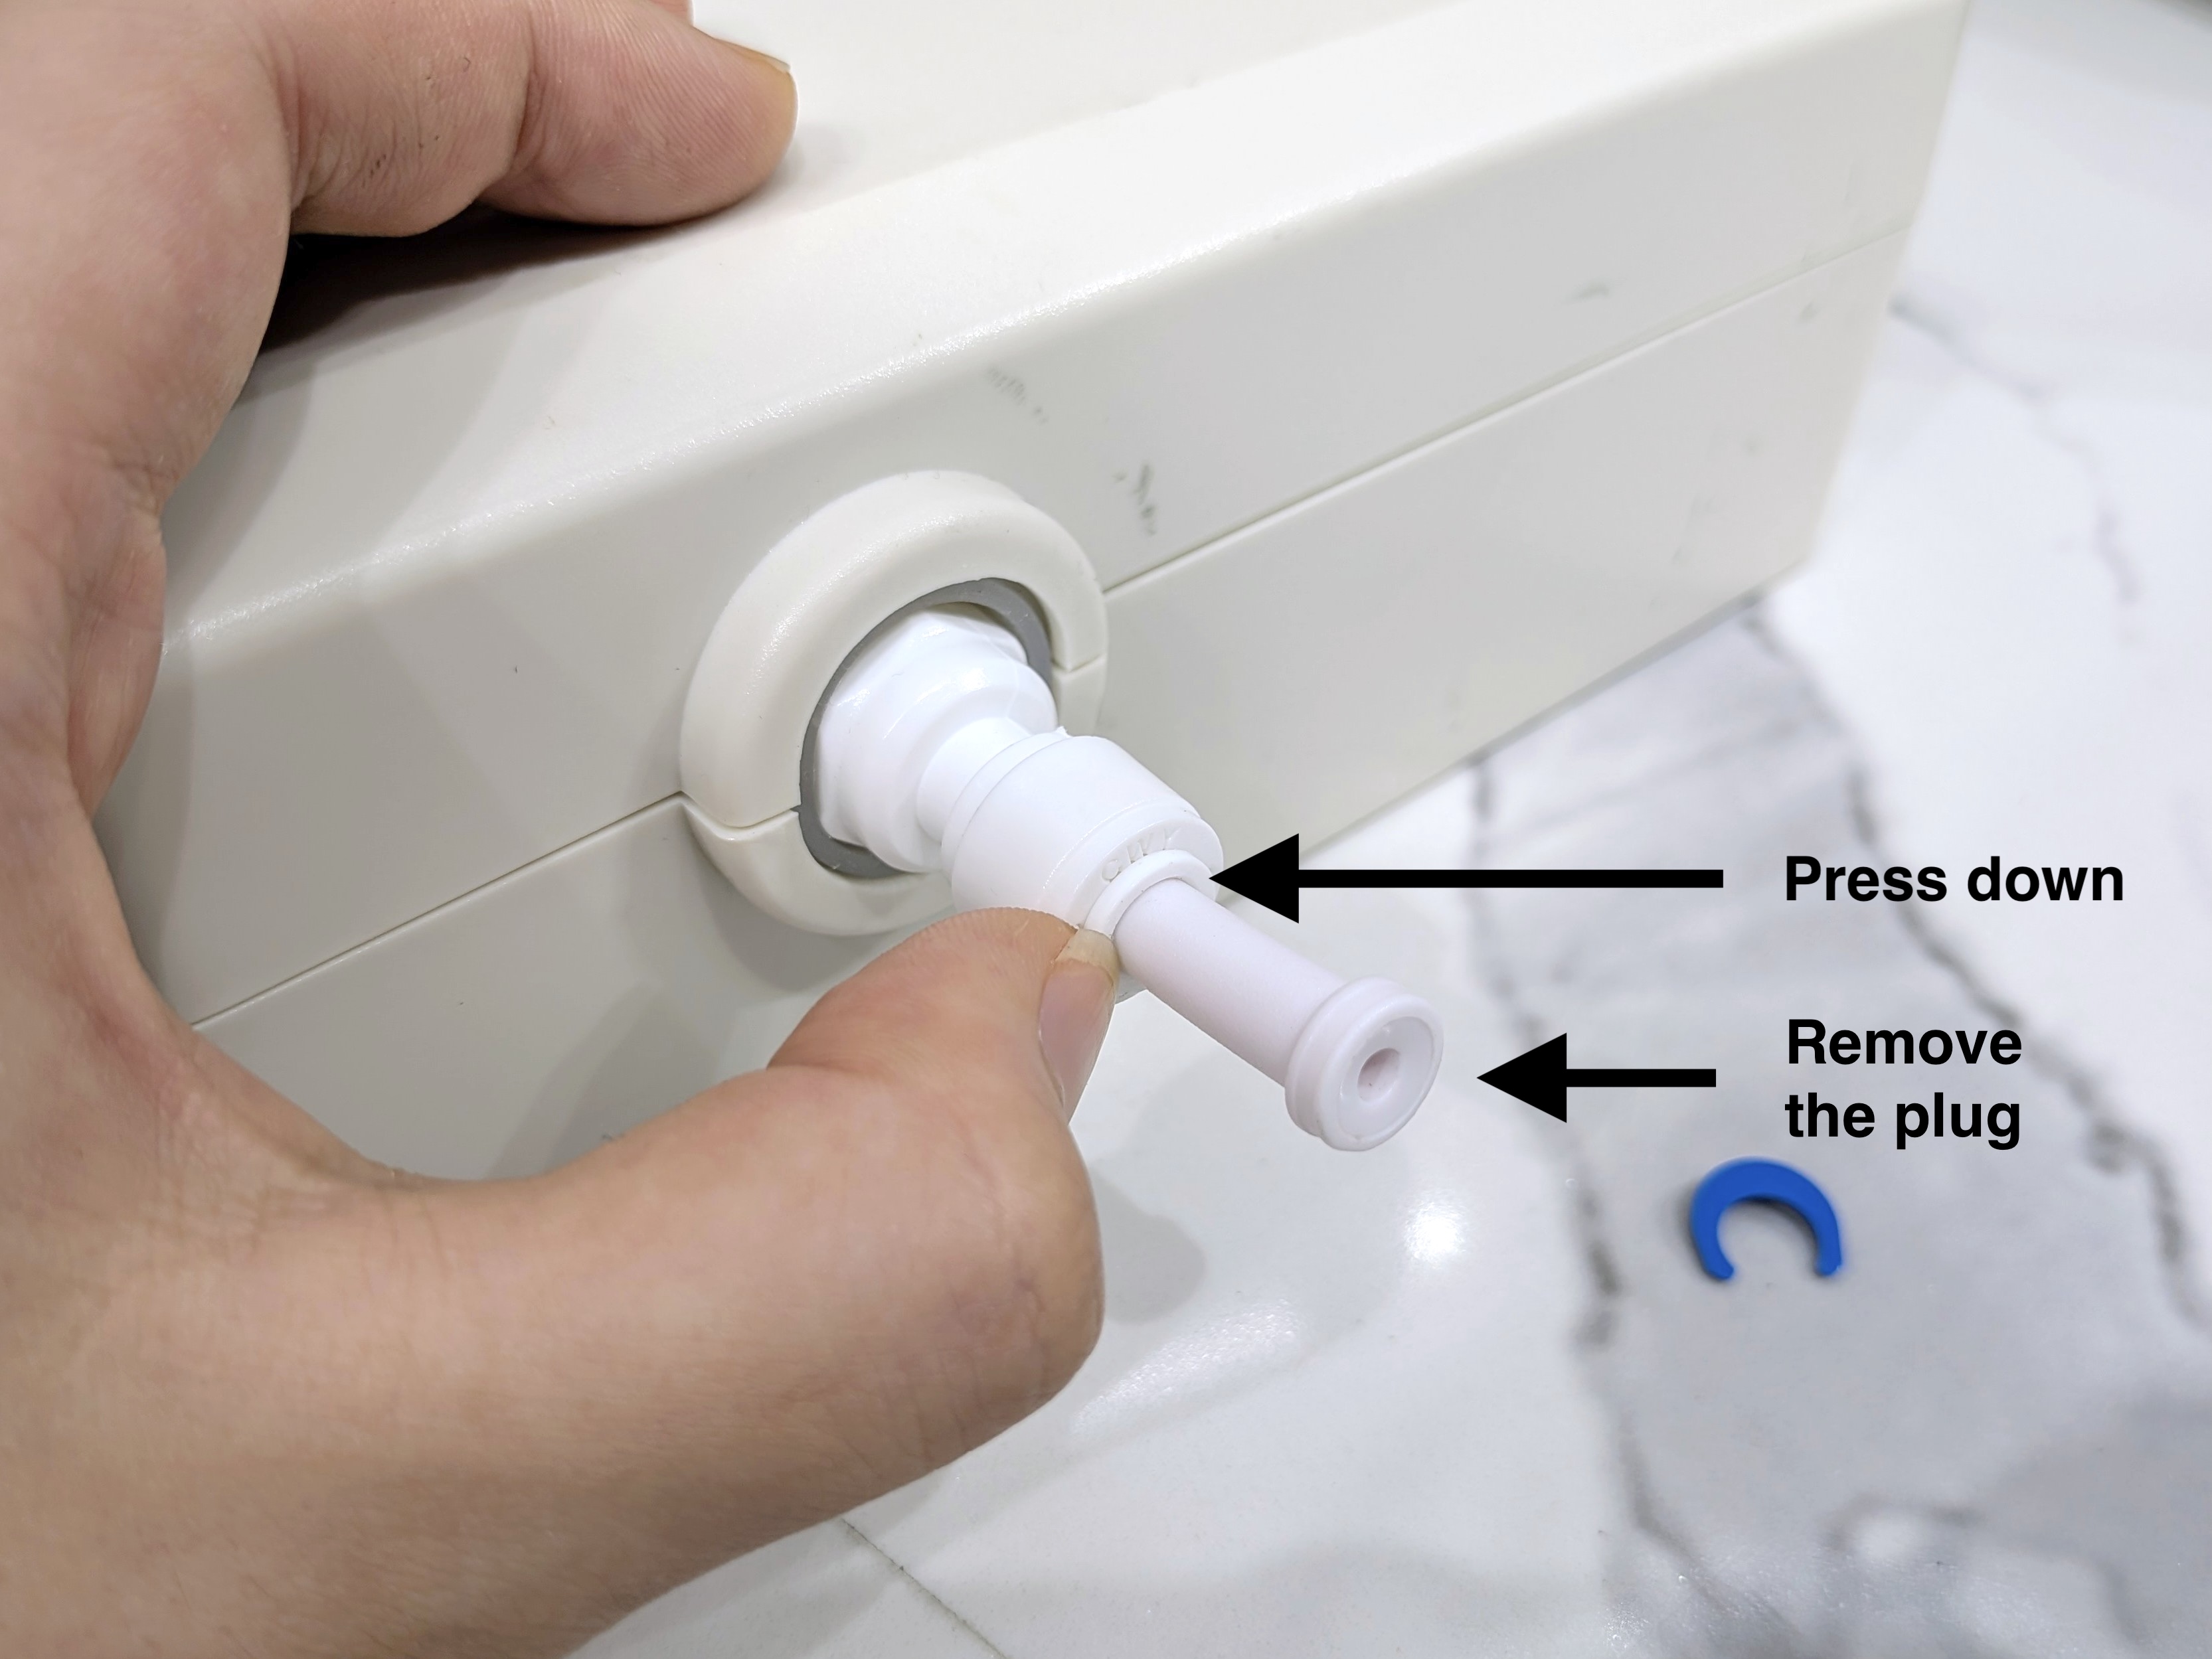
Image 9
To remove the white plug, first remove the blue clip, then press the part shown in the photo.
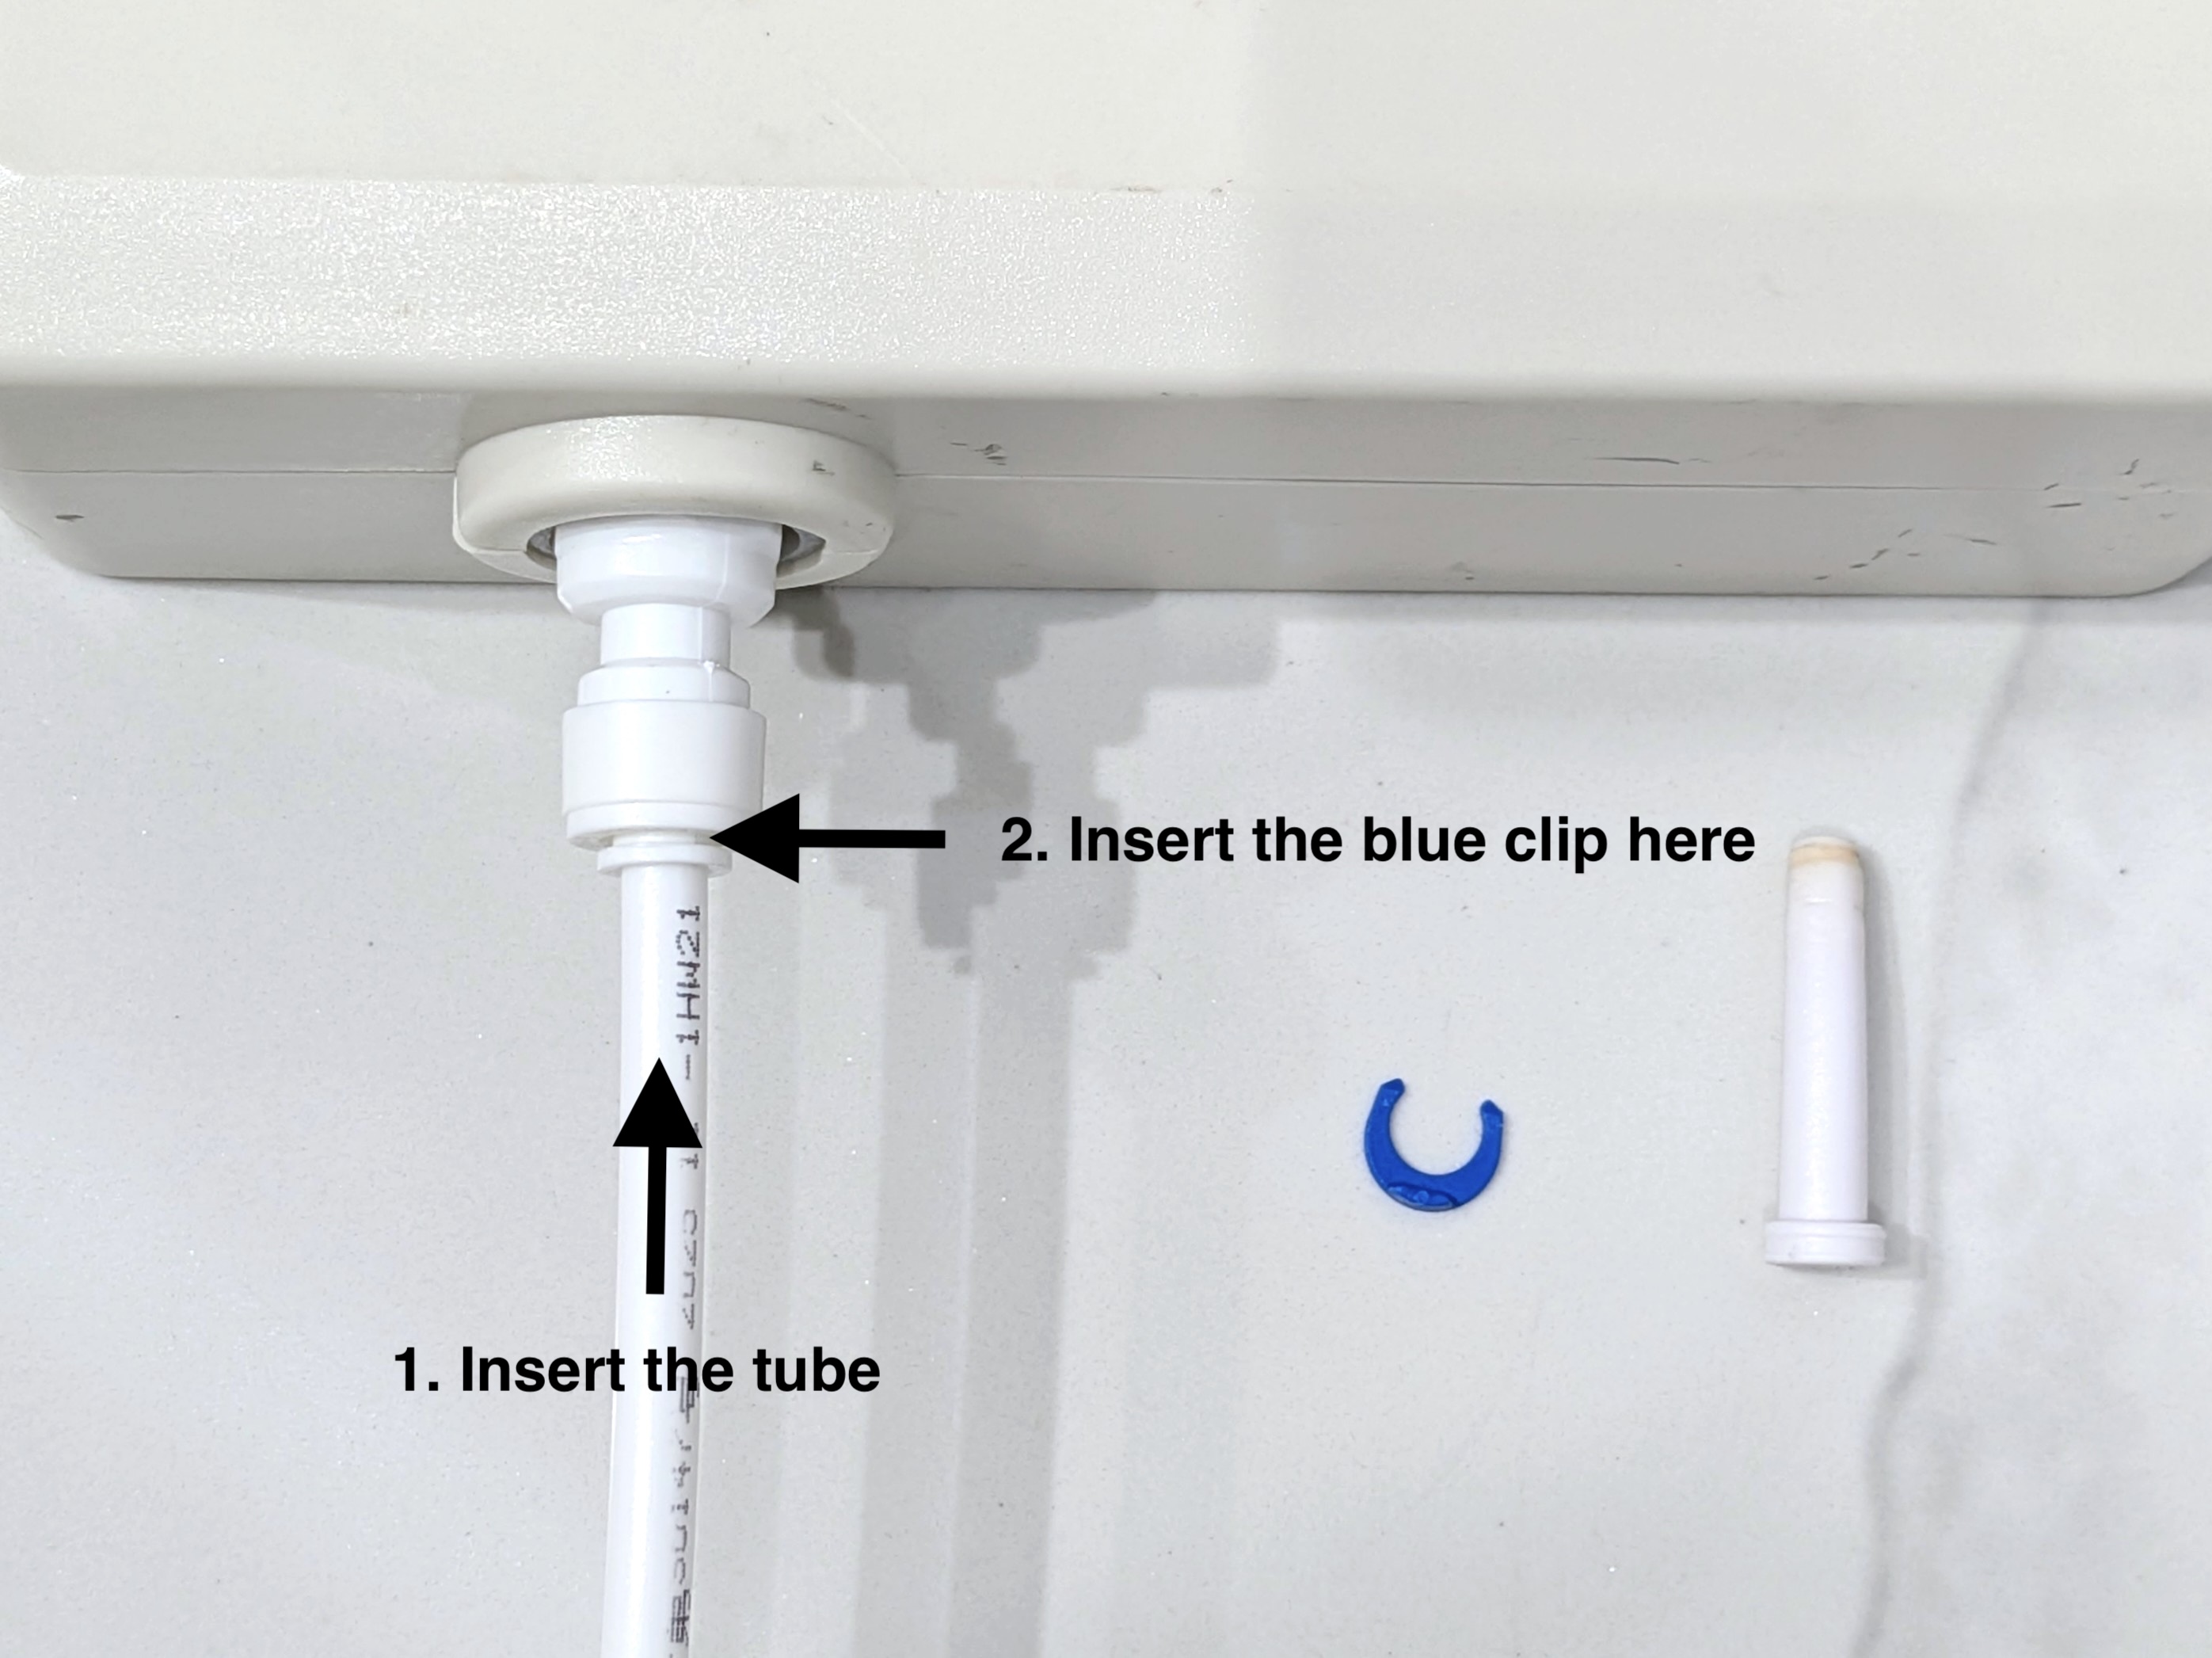
Image 10
Plug in the flowjet tube and then secure with a blue clip
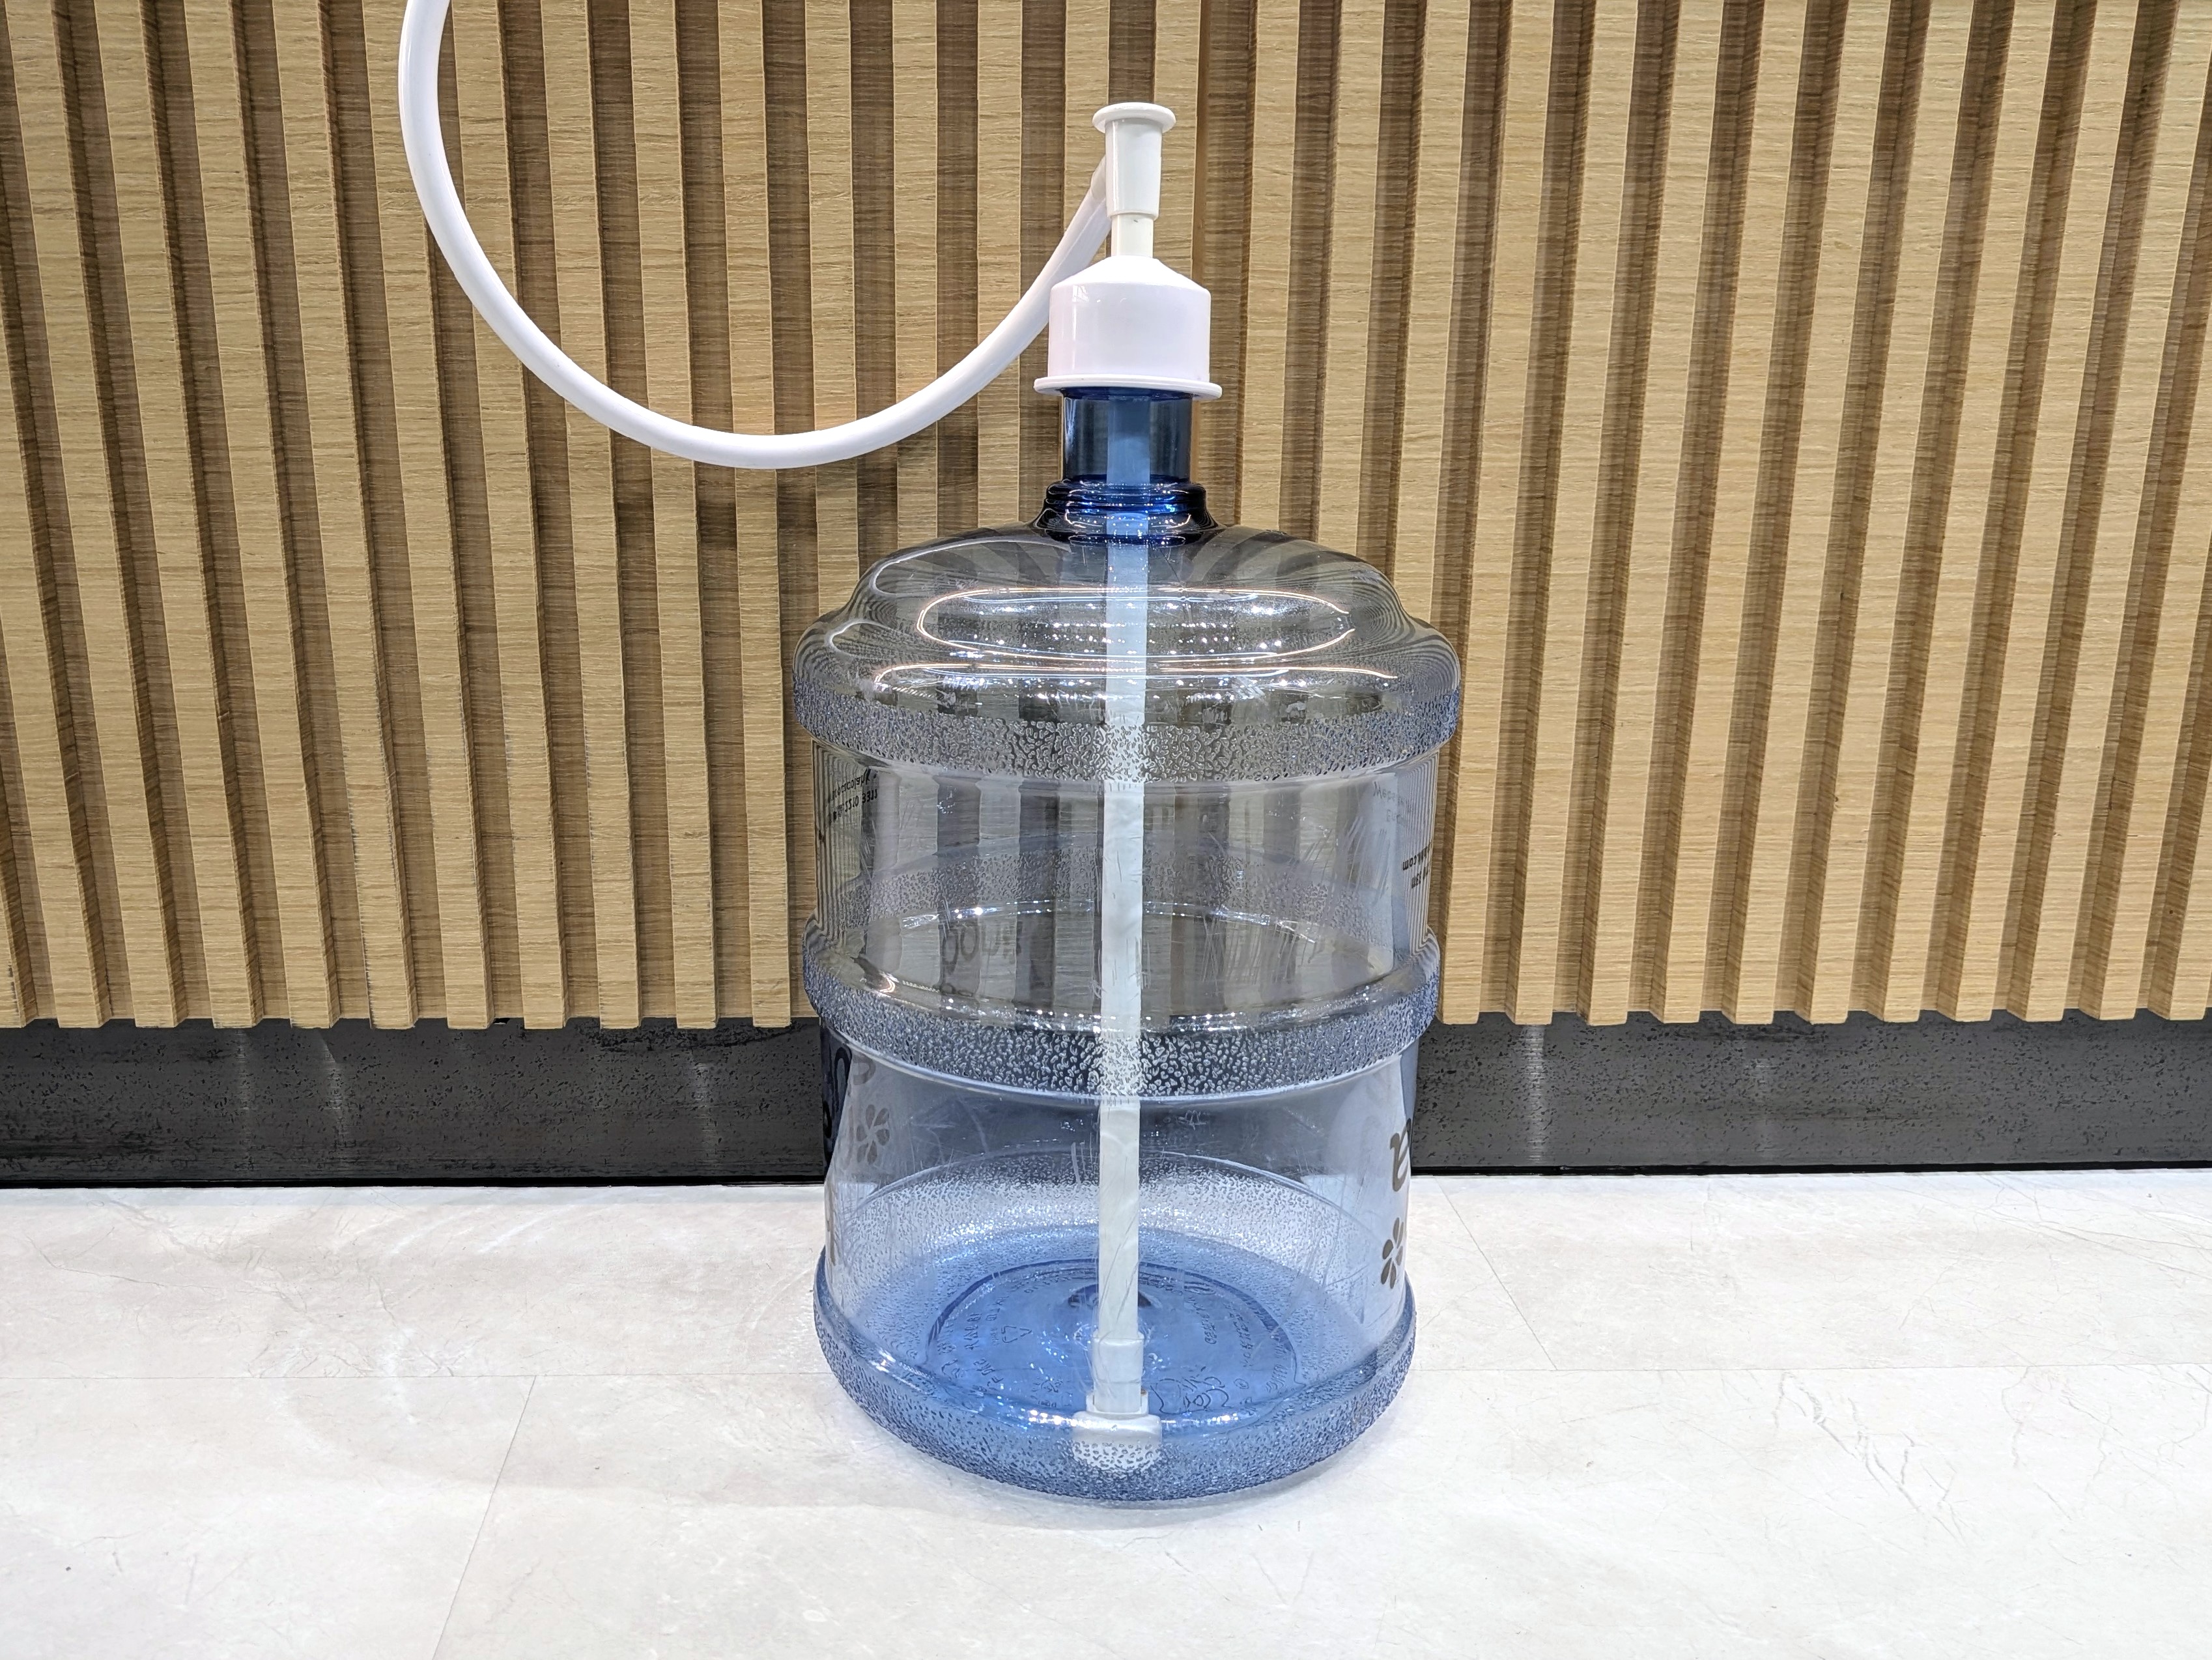
Image 11
Insert the flowjet intake into a water bottle
3. Connecting the drain pipe
For drainage, the rinser top includes a metal elbow connector already pre-installed.
How to connect:
1. Connect the black silicone tube to the metal elbow connector underneath the rinser by pushing the black tube into the elbow. Make sure the connection is secure. (Image 12)
2. Insert the other end of the silicone tube into an empty bottle for collecting dirty water, but make sure the end of the tube remains above the water level to provide better drainage ability, as shown in Image 13.
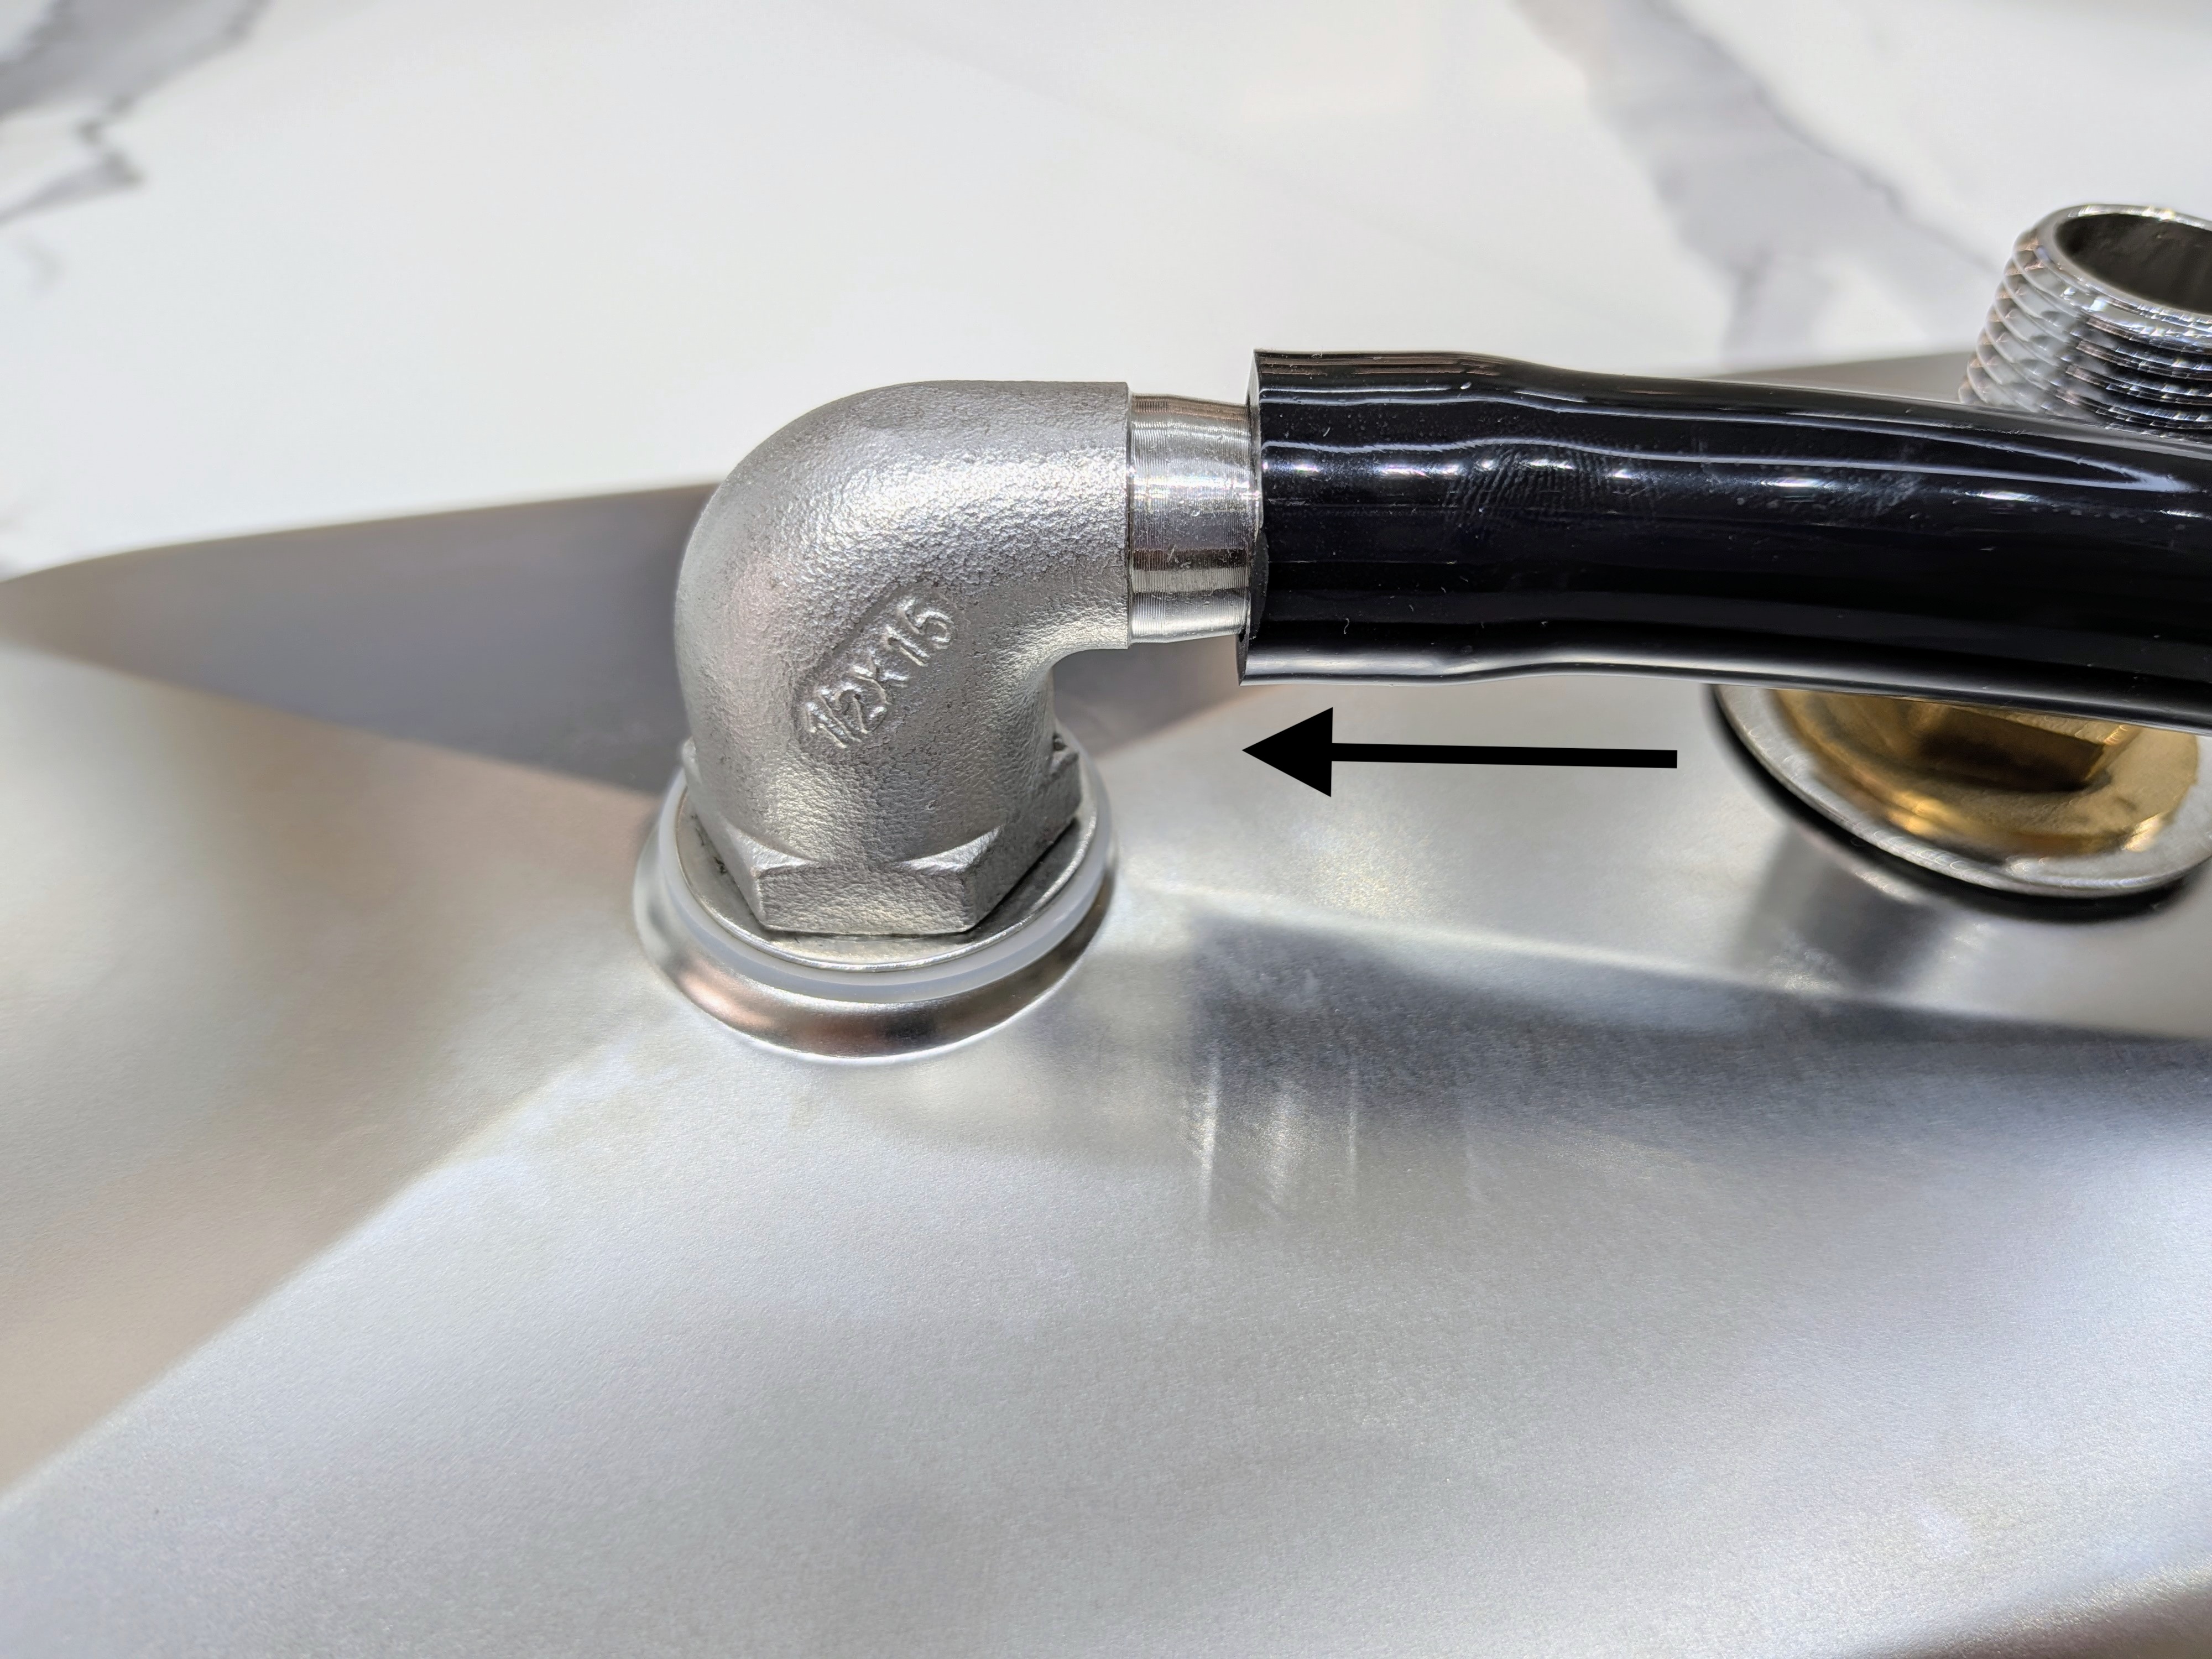
Image 12
The black tube inserted as indicated
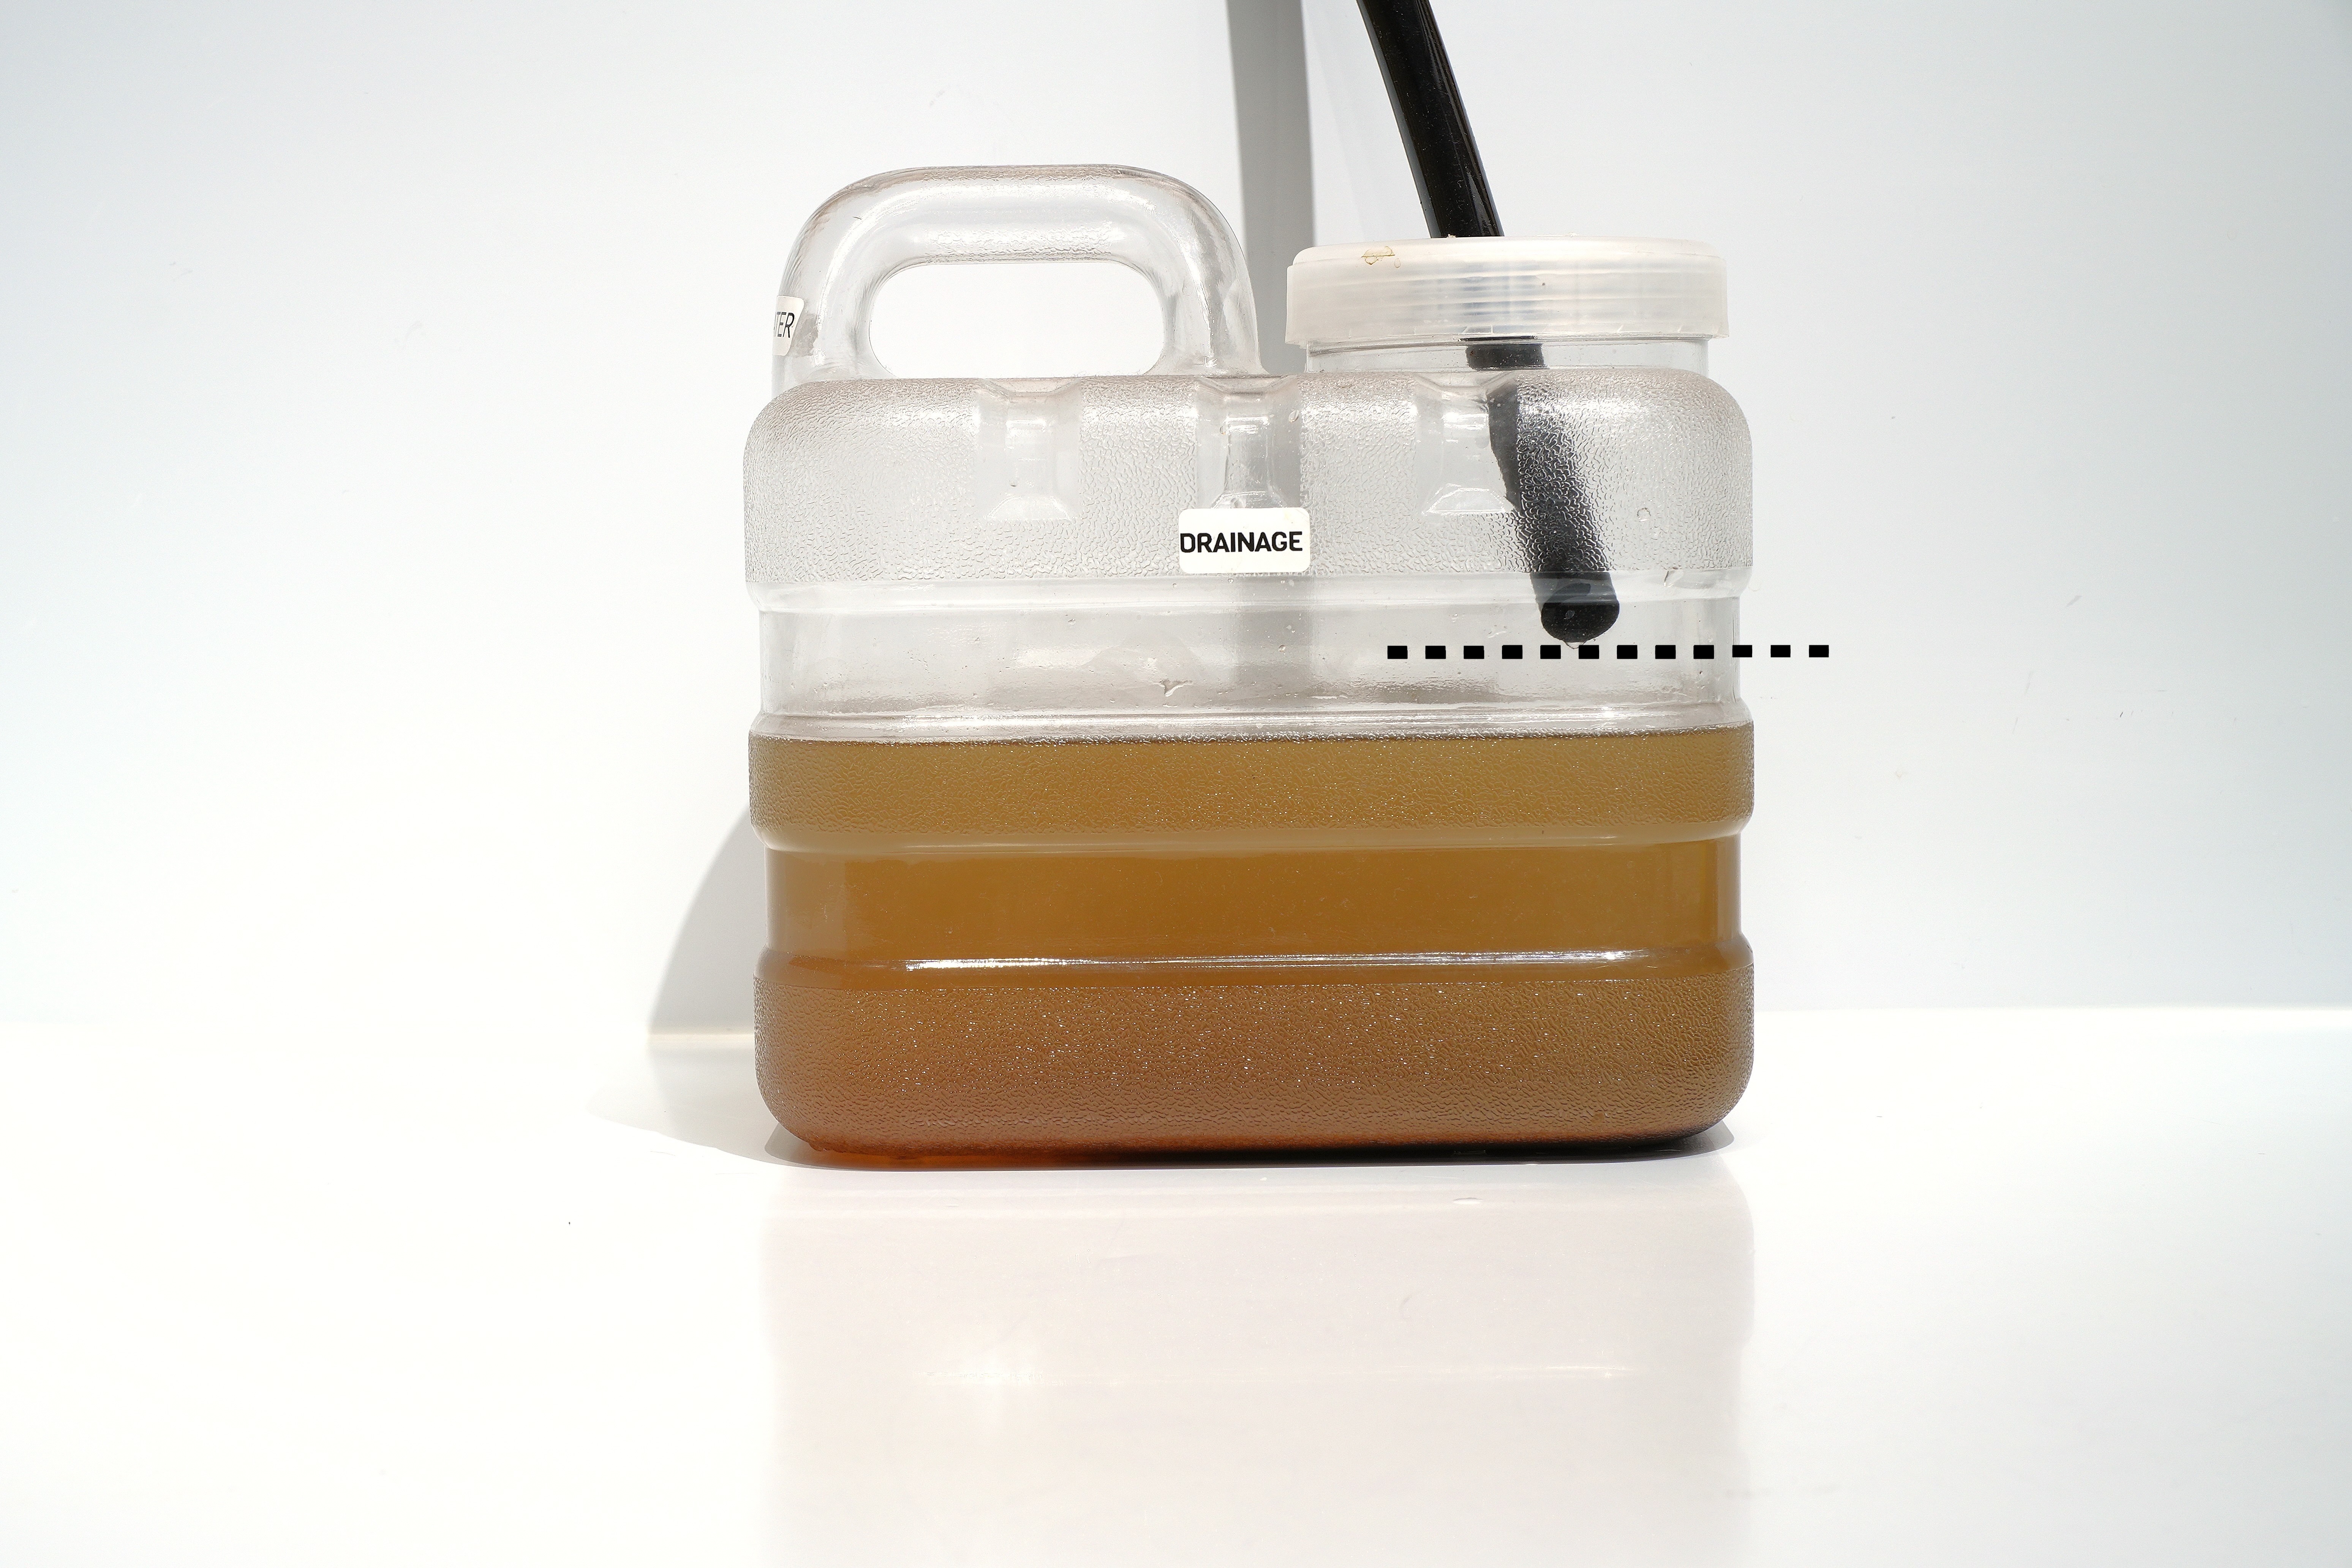
Image 13
The black tube above the water level


